
Introduction to Food Photography
Welcome to the fascinating world of food photography. This art form is not just about taking pictures of food, but it’s about capturing the essence, aroma, and flavor in a still image. It’s about making the viewer’s mouth water and their stomach growl with hunger just by looking at the photo. Let’s dive deeper into what food photography is and why it’s so important.
- Definition of Food Photography
- The Importance of Food Photography
Food photography is a genre of photography that focuses on presenting and capturing food in an attractive and appetizing way. It’s used by restaurants, food bloggers, cookbook authors, and advertisers to entice viewers and promote their products. The goal is to make the food look as appealing and delicious as possible. It’s a blend of creativity, artistry, and technical skill. Learn more about food photography on Wikipedia.
Food photography plays a crucial role in the food industry. It’s the first impression that potential customers get of a restaurant or a food product. A well-composed and enticing food photo can make a significant difference in the success of a restaurant, food blog, or cookbook. It can attract more customers, increase sales, and enhance the overall brand image. In the digital age, where social media platforms like Instagram are filled with food photos, the importance of food photography has increased even more.
Now that you know what food photography is and why it’s so important, let’s move on to some tips and techniques that can help you take stunning food photos. Stay tuned!
Food Photography Tips for Beginners
Food photography is a delightful blend of creativity and skill. It’s not just about snapping a picture of a delicious dish; it’s about capturing the essence of the food, the atmosphere, and the experience. Here are some essential tips for beginners to help you get started on your food photography journey.
- Understanding the basics
- Investing in the right equipment
- Practicing regularly
Before you start clicking away, it’s crucial to understand the basics of photography. This includes knowledge about lighting, composition, and angles. Lighting is the key to any good photograph, and more so in food photography. Natural light is your best friend, but if that’s not available, you can use artificial lights. Composition refers to how you arrange elements in your frame. A well-composed photograph is visually appealing. Finally, experiment with different angles to find the one that best showcases your food.
While it’s possible to take good food photos with a smartphone, investing in a good camera can significantly improve your photography. A DSLR or mirrorless camera with a good lens is a great starting point. Additionally, consider investing in a tripod for stability, reflectors to bounce light, and diffusers to soften harsh light. Remember, the equipment doesn’t make the photographer, but it can certainly help.
Like any other skill, the key to improving your food photography is regular practice. Try to photograph different types of food in various settings. Experiment with different lighting conditions, compositions, and angles. Review your photos critically and learn from your mistakes. Over time, you’ll develop your unique style and improve your skills.
Remember, the journey of food photography is a marathon, not a sprint. So, take your time, enjoy the process, and keep learning. Happy clicking!
Basics of Food Photography
One of the most important aspects of food photography is understanding your camera. Whether you’re using a DSLR, mirrorless, or a smartphone camera, each has its unique features and settings that can significantly impact the quality of your photos.
Understanding Your Camera
Before we dive into the specifics of food photography, it’s essential to understand the basics of your camera. This includes knowing the different types of cameras and their features, as well as understanding the various camera settings.
- Camera types and their features
- DSLR Cameras: These are the most professional type of camera. They offer the highest quality images, a wide range of lenses, and full manual control over settings. However, they are also the most expensive and can be bulky to carry around.
- Mirrorless Cameras: These cameras are lighter and more compact than DSLRs, but still offer high-quality images and manual control. They are a popular choice for food bloggers and photographers who need to travel light.
- Smartphone Cameras: While not as professional as DSLRs or mirrorless cameras, smartphones have come a long way in terms of camera quality. They are convenient, easy to use, and perfect for social media posts.
- Understanding camera settings
- Aperture: This controls the amount of light that enters the camera. A lower number means more light and a shallower depth of field, which is often used in food photography to blur the background.
- Shutter Speed: This controls how long the camera’s shutter is open. A faster shutter speed freezes motion, while a slower speed can create a blur effect.
- ISO: This controls the camera’s sensitivity to light. A higher ISO allows for shooting in low light conditions, but can also result in more noise or grain in the image.
- White Balance: This adjusts the color temperature of your image, ensuring that whites appear white and not yellow or blue.
There are three main types of cameras used in food photography: DSLR, mirrorless, and smartphone cameras.
Understanding your camera settings is crucial for capturing the perfect shot. Here are some key settings you should know:
By understanding your camera and its settings, you can take full control over your food photography and create stunning, mouth-watering images.
Lighting in Food Photography
Lighting plays a crucial role in food photography. It can make your food look appetizing and fresh, or dull and unappealing. There are two main types of light that you can use: natural and artificial.
- Natural light vs Artificial light
- Food Photography Lighting Tips
- Use a diffuser: This can soften the light and reduce harsh shadows.
- Experiment with angles: Try shooting your food from different angles to see how the light changes the look of the food.
- Use reflectors: These can help bounce light onto the darker areas of your food.
- Control your light: Whether you’re using natural or artificial light, make sure you can control it. This can mean waiting for the right time of day for natural light, or adjusting the strength and direction of artificial light.
Natural light is the light that comes from the sun. It’s soft, diffused, and can bring out the natural colors of the food. However, it’s not always available, especially during the evening or on cloudy days. On the other hand, artificial light, such as from lamps or flashes, is always available. It can be controlled and manipulated to create the desired effect. However, it can also create harsh shadows if not used correctly. Both types of light have their pros and cons, and the choice between them depends on your specific needs and circumstances.
Here are some tips to help you make the most of your lighting in food photography:
In conclusion, understanding and mastering lighting in food photography can greatly improve your photos. So, don’t be afraid to experiment and practice!
Food Photography Techniques
Food photography is an art that requires a blend of creativity and technical skills. Let’s delve into some DIY techniques that you can use to enhance your food photography skills.
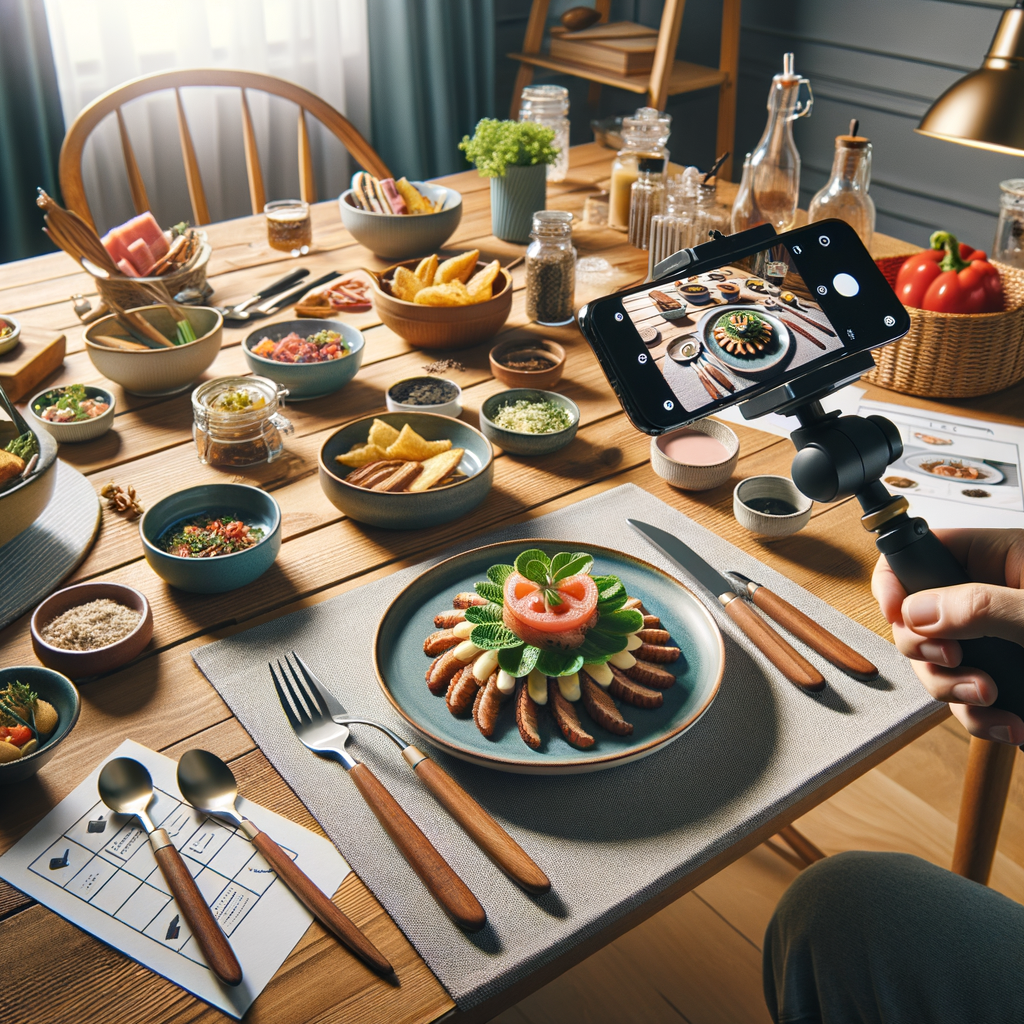
DIY Food Photography
DIY food photography is a cost-effective way to capture stunning images of food. It involves setting up a home studio and using household items as props. Let’s explore these techniques in detail.
- Setting up a home studio
- Using household items as props
Setting up a home studio for food photography doesn’t require a huge investment. You can start with a small table near a window for natural light. A white or light-colored tablecloth can serve as a perfect backdrop. You can also use a foam board as a reflector to bounce off the light onto your food. Remember, good lighting is key in food photography.
Household items can add a touch of realism to your food photos. You can use kitchen utensils, napkins, or even ingredients as props. For instance, a spoon can add depth to a soup photo, while sprinkling some herbs around the dish can make it look more appealing. Be creative and experiment with different items to find what works best for your photos.
In conclusion, DIY food photography is a fun and affordable way to improve your skills. With a bit of creativity and practice, you can capture mouth-watering images right at your home.
Food Styling Tips
Food styling is an art that can transform your food photography from good to great. It’s all about presenting your food in a way that makes it look appealing and appetizing. Here are a couple of tips to help you get started:
- Arranging food for visual appeal
- Using color and texture to your advantage
When arranging food, think about the composition and balance. You want to create a scene that draws the viewer’s eye to the food. Consider the size, shape, and color of the food and how they interact with each other. For example, if you’re photographing a salad, you might want to place the colorful ingredients at the top to catch the viewer’s eye. Remember, the goal is to make the food look so good that people can’t help but want to eat it.
Color and texture can make a big difference in food photography. Bright, vibrant colors can make your food pop, while different textures can add depth and interest to your photos. For instance, the shiny, smooth surface of a red apple can contrast beautifully with the rough, rustic texture of a wooden table. Don’t be afraid to play around with different colors and textures to see what works best for your photos.
Remember, the best food photos are the ones that make you want to reach into the picture and take a bite. So, take your time, experiment with different techniques, and most importantly, have fun!
Advanced Food Photography Guide
As you continue to develop your food photography skills, it’s essential to explore advanced techniques that can help your images stand out. One such area is food photography composition. Let’s delve into some key aspects of this.
Food Photography Composition
Composition is the arrangement of elements in a photograph. It’s the way you organize the food, props, and background to create a visually pleasing and impactful image. Here are two crucial aspects to consider:
- Understanding the Rule of Thirds
- Using Angles Effectively
The rule of thirds is a basic principle in photography that suggests dividing your image into nine equal parts by two equally spaced horizontal lines and two equally spaced vertical lines. The theory is that if you place points of interest along these lines or at their intersections, your photo becomes more balanced and will enable a viewer to interact with it more naturally. Read more about the rule of thirds on Wikipedia.
Angles can dramatically change the look and feel of your food photography. Shooting straight down, or ‘bird’s eye’ view, allows you to showcase the food’s shape and color. Shooting from the side can highlight layers and details. Experiment with different angles to find what works best for each dish. Remember, there’s no ‘one-size-fits-all’ angle in food photography.
Mastering these two aspects of composition can significantly improve your food photography, making your images more engaging and visually appealing. Practice and experimentation are key to finding what works best for you and the food you’re photographing.
Food Photography Props
Props are a key part of food photography. They can add depth, interest, and context to your photos. But how do you choose the right ones and create a theme with them? Let’s explore.
-
Choosing the Right Props
Choosing the right props for your food photography can make a big difference. The props should complement the food, not distract from it. Consider the color, texture, and size of the props. They should match the style and mood of the photo. For example, if you’re photographing a rustic apple pie, you might choose a wooden cutting board and vintage pie server as your props.
It’s also important to consider the practicality of the props. They should be easy to handle and not too fragile. You don’t want to worry about breaking a prop in the middle of a shoot!
-
Creating a Theme with Props
Creating a theme with your props can help to tell a story in your food photography. The theme could be based on the type of food, the season, or a specific color scheme. For example, for a summer BBQ photo, you could use props like a checkered tablecloth, BBQ tools, and a pitcher of lemonade.
Remember, the theme should enhance the food, not overshadow it. The focus should always be on the delicious dish you’re photographing!
In conclusion, props can greatly enhance your food photography. By carefully choosing the right props and creating a theme, you can add depth and interest to your photos. So, don’t be afraid to experiment and have fun with it!
Smartphone Food Photography Tips
With the advancement in technology, smartphones now come equipped with high-quality cameras that can compete with professional cameras. This section will provide tips on how to utilize your smartphone’s camera settings and edit photos on your smartphone for stunning food photography.
- Utilizing your smartphone’s camera settings
Understanding and utilizing your smartphone’s camera settings can significantly improve the quality of your food photos. Here are some tips:
- Focus: Tap on the screen where your subject is to ensure it’s in focus. This will make your food look sharp and clear.
- Exposure: Adjust the exposure to control the light in your photos. If your photo is too dark, increase the exposure. If it’s too bright, decrease it.
- White Balance: Use the white balance setting to make the colors in your photos look natural. This is especially important for food photography, as you want the colors of the food to be accurate.
- Grid Lines: Turn on the grid lines feature to help you compose your photos. The rule of thirds, where you place your subject along the grid lines or at their intersections, can make your photos more interesting.
Remember, every smartphone is different, so take some time to explore and understand your device’s camera settings.
- Editing photos on your smartphone
Editing is an essential part of food photography. It can turn a good photo into a great one. Here are some editing tips you can do right on your smartphone:
- Brightness and Contrast: Adjust the brightness and contrast to make your photo pop. Be careful not to overdo it, as it can make your photo look unnatural.
- Saturation: Increase the saturation to make the colors in your photo more vibrant. This can make your food look more appetizing.
- Sharpness: Increase the sharpness to make the details of your food stand out.
- Crop: Use the crop tool to remove any unnecessary parts of the photo and focus on the food.
There are many photo editing apps available that offer these features and more. Some popular ones include Adobe Lightroom and VSCO.
With these tips, you can start taking stunning food photos with your smartphone. Remember, practice makes perfect. So, keep experimenting and improving your skills.
Conclusion: Starting Your Food Photography Journey
As we wrap up this comprehensive guide on food photography, it’s essential to remember that the journey to becoming a skilled food photographer is a continuous one. It requires patience, practice, and a willingness to learn and adapt. Let’s recap some of the key takeaways from this guide and encourage you to continue learning and practicing.
- Recap of key takeaways:
- Encouragement for continuous learning and practice:
Food photography is more than just taking pictures of food. It’s about capturing the essence and appeal of the dish, making it look as delicious and enticing as it tastes. We’ve covered a range of topics, from the basics of food photography, techniques, and advanced guides, to tips on using your smartphone for food photography. Remember, lighting is crucial, and the angle can make or break your photo. Don’t forget to experiment with props and backgrounds to enhance your food’s visual appeal.
Like any other skill, mastering food photography takes time and practice. Don’t be discouraged if your early photos don’t turn out as you’d hoped. Keep practicing, experimenting with different techniques, and learning from your mistakes. Consider joining online food photography communities or attending workshops to learn from others and improve your skills. Remember, the journey is just as important as the destination. Keep shooting, keep learning, and most importantly, keep enjoying the process.
As you embark on your food photography journey, remember that every great photographer started somewhere. Don’t be afraid to make mistakes, and don’t be discouraged by initial failures. Instead, use them as stepping stones to improve and grow. Happy shooting!