
Introduction to Homemade Sushi
Welcome to the exciting world of homemade sushi! This traditional Japanese dish has taken the world by storm with its unique flavors and artistic presentation. But did you know that you can recreate this culinary masterpiece right in your own kitchen? Let’s dive into the art of making sushi at home and explore the benefits it brings.
- Understanding the art of Japanese cuisine at home
- Benefits of making sushi at home
Japanese cuisine is renowned for its emphasis on fresh, high-quality ingredients and meticulous preparation. Sushi, in particular, is a testament to this culinary philosophy. Making sushi at home allows you to immerse yourself in this rich culinary tradition. It’s not just about rolling rice and fish; it’s about appreciating the beauty and flavor of each ingredient. The process of making sushi can be therapeutic and rewarding, providing a creative outlet that also results in a delicious meal.
There are several benefits to making sushi at home. First and foremost, it allows you to control the ingredients. You can choose high-quality, fresh ingredients and avoid any additives or preservatives often found in store-bought sushi. This can be particularly beneficial for those with dietary restrictions or allergies. Additionally, making sushi at home can be a fun and engaging activity for the whole family, promoting teamwork and creativity. Plus, it’s cost-effective. While sushi in restaurants can be quite expensive, making it at home can save you a significant amount of money, especially if you’re serving a large group.
So, are you ready to embark on your sushi-making journey? Let’s roll up our sleeves and get started!
Authentic Sushi Recipe
Creating an authentic sushi recipe at home can be a fun and rewarding experience. The key to achieving the perfect sushi lies in the quality of the ingredients used. Let’s take a closer look at the essential ingredients you will need and how to find the best quality ones.
Ingredients for Homemade Sushi
- Essential sushi ingredients
- Sushi rice: This is a special type of short-grain rice that becomes sticky when cooked. It’s the backbone of any sushi dish.
- Nori (seaweed sheets): These are used to wrap the sushi rolls.
- Fresh fish: Common choices include tuna, salmon, and eel. Always ensure your fish is sushi-grade for safety and quality.
- Vegetables: Cucumber, avocado, and carrots are popular choices.
- Soy sauce, wasabi, and pickled ginger: These are traditional accompaniments to sushi.
- Finding quality ingredients
- Buy sushi-grade fish from a reputable fishmonger or specialty store. This ensures it’s safe to consume raw.
- Choose fresh vegetables for the best flavor and texture.
- Look for sushi rice and nori at Asian grocery stores or online. They often have a wider selection than regular supermarkets.
For an authentic sushi recipe, you will need the following ingredients:
Finding high-quality ingredients is crucial for the taste and safety of your homemade sushi. Here are some tips:
Remember, the quality of your sushi will largely depend on the quality of your ingredients. So, take your time to find the best ones. With these ingredients in hand, you’re ready to start making your own authentic sushi at home!
Sushi Rice Preparation
Preparing sushi rice is a crucial step in making homemade sushi. The quality and taste of your sushi largely depend on the sushi rice you use. Let’s delve into the process of choosing the right rice and preparing it for your sushi.
- Choosing the Right Rice
- Preparing and Cooking Sushi Rice
When it comes to sushi, not all rice is created equal. The best type of rice for sushi is short-grain Japanese rice. This rice is known for its unique stickiness and texture, which is essential for sushi. The most popular types are Japonica, Koshihikari, and Sasanishiki. These can be found in most Asian grocery stores or online. For more information about these types of rice, you can visit this Wikipedia page.
Once you’ve chosen the right rice, it’s time to prepare and cook it. Here’s a simple step-by-step guide:
| Step | Instructions |
|---|---|
| 1 | Rinse the rice under cold water until the water runs clear. This removes excess starch and prevents the rice from becoming too sticky. |
| 2 | Let the rice soak in water for about 30 minutes. This helps the grains absorb water and cook more evenly. |
| 3 | Drain the rice and add it to your rice cooker. Add water according to the rice cooker’s instructions. |
| 4 | Once the rice is cooked, let it rest for about 15 minutes to allow the remaining moisture to distribute evenly. |
| 5 | Finally, while the rice is still warm, add sushi vinegar (a mixture of rice vinegar, sugar, and salt) and gently mix it into the rice. Be careful not to mash the rice grains. |
And there you have it! You now know how to prepare sushi rice. Remember, practice makes perfect. Don’t be discouraged if your first few attempts don’t turn out perfect. With time and patience, you’ll be a sushi rice master in no time.
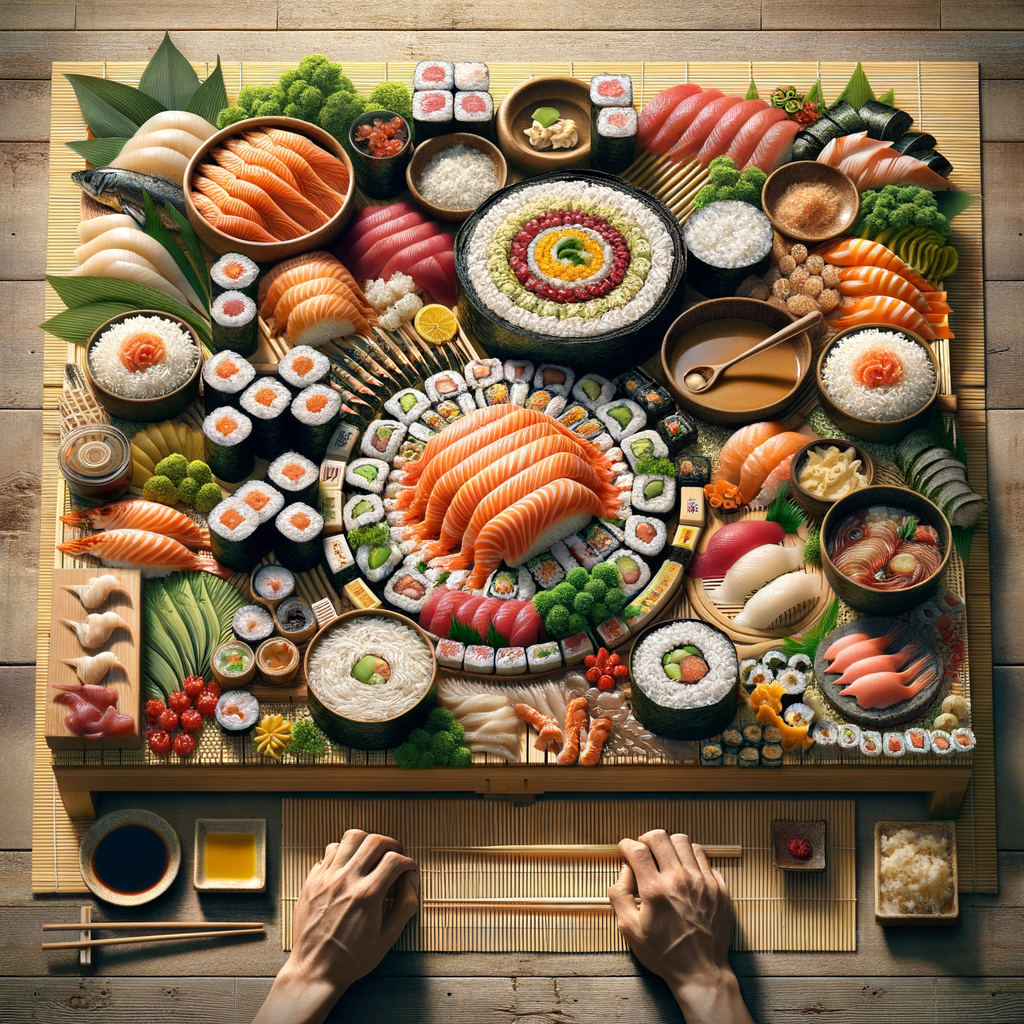
How to Roll Sushi
Rolling sushi may seem like a daunting task, but with the right tools and a little practice, you can create your own sushi rolls at home. Let’s start by discussing the essential tools you’ll need.
Tools Needed for Sushi Rolling
Before you start rolling your sushi, you’ll need to gather a few key tools. These tools will help you achieve the perfect sushi roll.
- Overview of sushi mat
- Other essential tools
A sushi mat, also known as a makisu, is a bamboo mat that is used to shape and tighten sushi rolls. It’s a crucial tool for sushi making. The mat is made up of bamboo sticks bound together with string. When rolling sushi, the mat helps to evenly distribute pressure along the roll, ensuring a tight and even roll. You can find sushi mats in most kitchenware stores or online. If you don’t have a sushi mat, you can also use a clean tea towel as a substitute. Learn more about sushi mats here.
Aside from a sushi mat, there are a few other tools you’ll need. A sharp knife is crucial for cutting the sushi roll into bite-sized pieces. A rice paddle or spatula is used to spread the sushi rice evenly onto the seaweed sheet. You’ll also need a bowl of water to dip your fingers in, as this will prevent the sticky rice from sticking to your hands. Lastly, a bamboo rice paddle can be helpful for mixing the sushi rice with the vinegar mixture and for spreading the rice onto the seaweed sheet.
Now that you have your tools ready, you’re all set to start rolling your sushi. Stay tuned for our step-by-step guide on how to roll sushi.
Step-by-Step Sushi Rolling Guide
Let’s dive into the step-by-step process of sushi rolling. This guide will help you create delicious homemade sushi with ease.
- Spreading the Rice
- Adding Fillings
- Rolling the Sushi
- Perfecting the Roll
Start by spreading a thin layer of sushi rice on your nori sheet. The rice should cover about 3/4 of the nori, leaving a small strip at the top for sealing the roll. Remember, the rice is sticky, so wet your hands with a bit of water to prevent sticking. Nigiri sushi is a popular type where the rice is spread out and then topped with various ingredients.
Next, place your desired fillings on top of the rice. This could be anything from fresh fish like tuna or salmon, to vegetables like cucumber or avocado. Be careful not to overfill your sushi roll, as it could make the rolling process more difficult.
Now, it’s time to roll. Using your sushi mat, start at the bottom of the nori sheet and roll it up, applying gentle pressure to keep everything compact. Ensure the roll is tight enough to hold the fillings but not so tight that it squashes them.
Finally, use a sharp knife to cut your sushi roll into bite-sized pieces. Remember to wet the knife before each cut to prevent the rice from sticking. Congratulations, you’ve just made your first homemade sushi roll!
With these simple steps, you can enjoy the art of sushi making at home. Practice makes perfect, so don’t be discouraged if your first few attempts don’t turn out as expected. Keep trying, and soon you’ll be rolling sushi like a pro!
Sushi Making Tips
When it comes to making sushi at home, there are a few key tips and tricks to keep in mind. From the do’s and don’ts to common mistakes to avoid, we’ve got you covered. Let’s dive in!
- Do’s and Don’ts in sushi making
- Do use fresh ingredients. The quality of your ingredients can make or break your sushi. Always opt for fresh fish and vegetables.
- Do invest in a good quality sushi mat. This will help you roll your sushi evenly and tightly.
- Do practice. Sushi making is an art and it takes time to perfect. Don’t be discouraged if your first few attempts don’t turn out perfect.
- Don’t overfill your sushi rolls. This can make them difficult to roll and they may fall apart.
- Don’t forget to wet your hands before handling sushi rice. This will prevent the rice from sticking to your hands.
- Don’t use too much wasabi or soy sauce. These should complement the sushi, not overpower it.
- Common mistakes to avoid
- Using too much rice: Remember, sushi is about balance. Too much rice can overpower the other ingredients.
- Not using the right rice: Sushi rice is a specific type of short-grain rice. Using a different type of rice can affect the texture and taste of your sushi.
- Not cutting the sushi properly: Use a sharp knife and make sure to wet it before each cut. This will help you get clean, even slices.
Do’s:
Don’ts:
Here are some common mistakes that beginners often make when making sushi:
Remember, practice makes perfect. Don’t be discouraged if your sushi doesn’t turn out perfect the first time. Keep trying and you’ll get the hang of it in no time!
Traditional Sushi Making
Delving into the world of sushi making can be a rewarding experience. Understanding the roots of this culinary art can enhance your appreciation for it, and allow you to create more authentic sushi at home. Let’s explore the traditional methods of sushi making and see how they differ from modern practices.
Difference between Traditional and Modern Sushi
While sushi is enjoyed worldwide, there are significant differences between traditional and modern sushi. These differences lie in the evolution of sushi and the key differences in ingredients and techniques.
- Understanding the evolution of sushi
- Key differences in ingredients and techniques
Sushi originated in Southeast Asia as a method of preserving fish in fermented rice. Over time, it evolved into a culinary art in Japan, where it was served with vinegar rice and fresh fish. Today, sushi has taken on many forms and flavors, incorporating a variety of ingredients to cater to different tastes around the world. Learn more about the history of sushi here.
Traditional sushi primarily uses fresh, local fish, and is often served with a simple garnish of wasabi and pickled ginger. The sushi rice is seasoned with a mixture of vinegar, sugar, and salt, which complements the flavor of the fish. The technique lies in the careful preparation of the fish and the delicate shaping of the sushi.
Modern sushi, on the other hand, often includes a variety of ingredients such as avocado, cream cheese, and even cooked ingredients like shrimp tempura. It also features different types of rolls, such as the California roll and the Dragon roll. These variations reflect the creative and diverse nature of modern sushi-making.
Whether you prefer the simplicity of traditional sushi or the variety of modern sushi, understanding the differences can enhance your sushi-making experience. Stay tuned for our traditional sushi recipe in the next section!
Traditional Sushi Recipe
Let’s dive into the exciting world of traditional sushi making. This recipe will guide you through the process of creating authentic sushi, just like the ones made in Japan.
- Ingredients for traditional sushi
- Sushi rice: 2 cups
- Rice vinegar: 1/4 cup
- Sugar: 2 tablespoons
- Salt: 1/2 teaspoon
- Nori (seaweed sheets): 10 sheets
- Fresh fish (tuna, salmon, etc.): 1/2 pound
- Vegetables (cucumber, avocado, etc.): as desired
- Soy sauce: for dipping
- Wasabi and pickled ginger: for serving
- Steps in making traditional sushi
- Rinse the sushi rice under cold water until the water runs clear. Cook it according to the package instructions.
- While the rice is cooking, mix the rice vinegar, sugar, and salt in a small bowl. Heat it in the microwave until the sugar dissolves.
- Once the rice is done, mix in the vinegar mixture and let it cool.
- Place a sheet of nori on a bamboo sushi mat. Wet your hands and spread a thin layer of rice on the nori, leaving about 1 inch at the top.
- Place your chosen ingredients in a line in the middle of the rice. Roll the sushi tightly using the bamboo mat.
- Cut the sushi roll into bite-sized pieces using a sharp knife. Repeat with the remaining ingredients.
- Recap of the sushi at home guide
- Encouragement for continued practice
Here are the ingredients you will need:
Follow these steps to make your sushi:
With this guide, you’ve learned how to prepare the ingredients, cook the sushi rice, and roll your sushi. Remember, practice makes perfect. Don’t be discouraged if your first few rolls aren’t perfect. The most important thing is to enjoy the process and the delicious sushi you’ve made.
Keep practicing your sushi-making skills. The more you practice, the better you’ll get. Remember, even professional sushi chefs started from scratch. Don’t give up, and keep rolling!
For more information on traditional sushi, visit Wikipedia.