
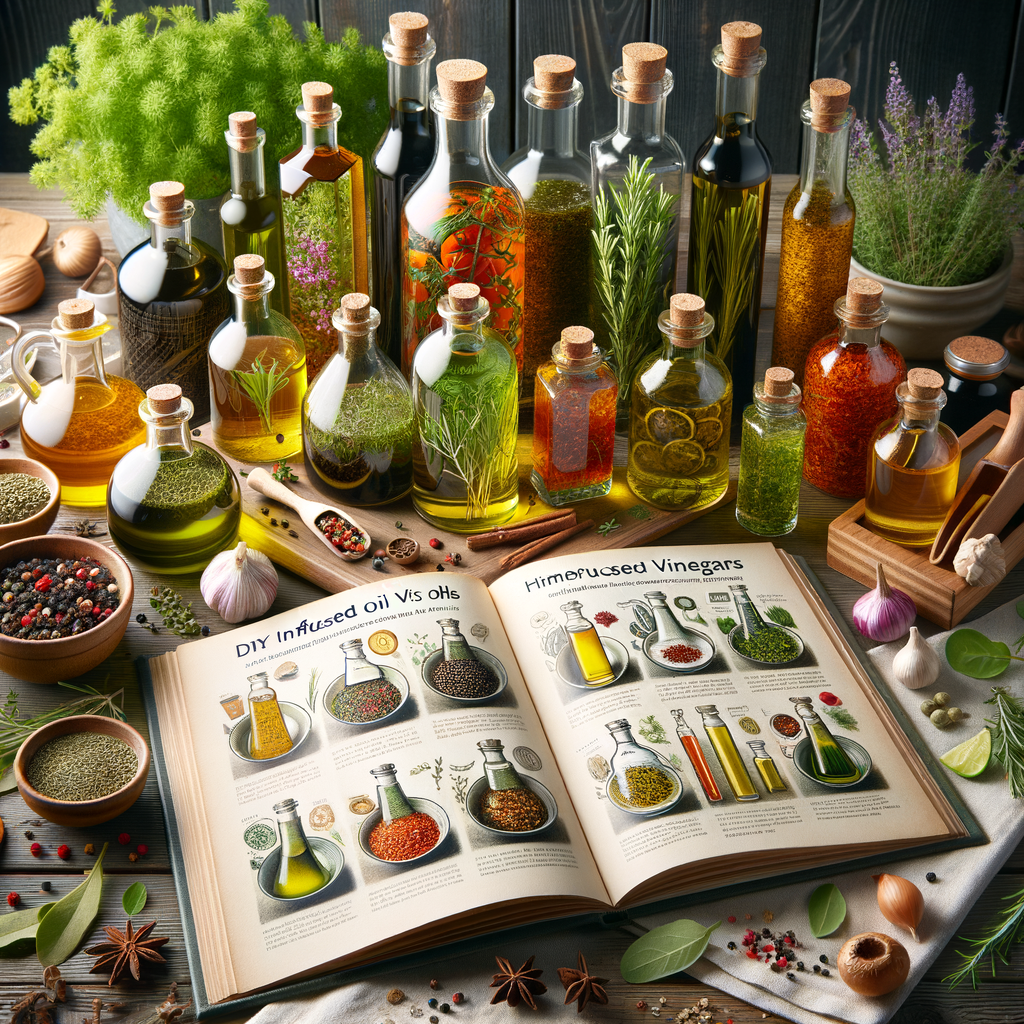
Introduction to DIY Infused Oils and Vinegars
Welcome to the fascinating world of homemade infused oils and vinegars! These flavorful concoctions are not only a joy to create but also offer a plethora of benefits. Whether you’re a cooking enthusiast or a health-conscious individual, learning to infuse oils and vinegars at home can be a rewarding experience.
- Benefits of Homemade Infused Oils and Vinegars
- Overview of the Infusion Process
Homemade infused oils and vinegars are a treasure trove of benefits. They allow you to control the quality of ingredients, avoiding the preservatives and additives often found in store-bought versions. Plus, they open up a world of culinary possibilities, enabling you to customize flavors to your liking. Not to mention, they make for thoughtful, personalized gifts! According to a Wikipedia article, infused oils and vinegars can also have potential health benefits, depending on the herbs and spices used.
The process of infusing oils and vinegars is simple and straightforward. It involves steeping your choice of herbs, spices, or fruits in oil or vinegar, allowing the flavors to meld over time. The key is to use high-quality, fresh ingredients and to ensure proper storage to maintain the flavor and safety of your infused creations. We’ll delve deeper into the process in the subsequent sections.
So, are you ready to embark on this flavorful journey? Let’s dive in and explore the art of making your own infused oils and vinegars!
Guide to Infusing Oils at Home
Infusing oils at home is a simple and enjoyable process that allows you to add a personal touch to your cooking. The key to successful oil infusion lies in choosing the right oil. Let’s delve into the details.
Choosing the Right Oil for Infusion
When it comes to infusing oils, not all oils are created equal. Some oils are better suited for infusion than others due to their flavor profiles and heat stability. Here are some things to consider:
- Types of oils suitable for infusion
- Factors to consider when choosing oil
There are several types of oils that are suitable for infusion. Olive oil is a popular choice due to its robust flavor and versatility. Other options include coconut oil, which has a mild flavor and high heat stability, and canola oil, which is neutral in flavor and can take on the taste of whatever you’re infusing it with. Avocado oil is another great option, with its high smoke point and buttery flavor. Olive oil and coconut oil are particularly good for infusions that will be used in cooking, while canola oil and avocado oil are excellent for salad dressings and dips.
When choosing an oil for infusion, there are several factors to consider. First, consider the flavor of the oil. Some oils have a strong flavor that can compete with the flavors you’re trying to infuse. Second, consider the heat stability of the oil. Some oils, like flaxseed oil, have a low smoke point and are not suitable for cooking. Finally, consider the health benefits of the oil. Some oils, like olive oil and avocado oil, are high in monounsaturated fats, which are heart-healthy. It’s also important to consider the cost of the oil, as some oils can be quite expensive.
In conclusion, the key to successful oil infusion lies in choosing the right oil. By considering the flavor, heat stability, health benefits, and cost of the oil, you can ensure that your infused oils are flavorful, healthy, and affordable.
Oil Infusion Techniques
When it comes to infusing oils at home, there are two main techniques you can use: the hot infusion method and the cold infusion method. Each method has its own benefits and is suitable for different types of oils and ingredients. Let’s explore each one in detail.
- Hot Infusion Method
- Choose your oil and ingredients. Some popular choices include garlic, herbs, and spices.
- Place the ingredients in a pan and pour the oil over them.
- Heat the mixture on a low setting for a few hours. Be careful not to let the oil boil or smoke.
- Once the oil has infused, strain the mixture and discard the ingredients.
- Store the infused oil in a clean, airtight container.
- Cold Infusion Method
- Choose your oil and ingredients. Fresh herbs, dried chilies, and citrus peels work well for this method.
- Place the ingredients in a jar and cover them with oil.
- Seal the jar and let it sit at room temperature for 1-2 weeks.
- Once the oil has infused, strain the mixture and discard the ingredients.
- Store the infused oil in a clean, airtight container.
The hot infusion method involves heating the oil and your chosen ingredients together. This technique is quick and easy, making it a popular choice for many home cooks. Here’s how you can do it:
Remember, the key to a successful hot infusion is to heat the oil slowly and gently. This allows the flavors to infuse without damaging the oil or burning the ingredients. Learn more about hot oil infusion here.
The cold infusion method, also known as the steeping method, involves letting the oil and ingredients sit together at room temperature. This method takes longer than the hot infusion method, but it can result in more complex flavors. Here’s how to do it:
The cold infusion method requires patience, but the result is a richly flavored oil that can elevate any dish. Learn more about cold oil infusion here.
Oil Infusion Recipes
Now that you know the basics of oil infusion, let’s dive into some delicious recipes you can try at home. These recipes are simple, easy to follow, and will add a burst of flavor to your meals.
- Garlic Infused Olive Oil
Garlic infused olive oil is a kitchen staple that can be used in a variety of dishes. Here’s how you can make it:
- Peel and finely chop 4 cloves of garlic.
- Place the chopped garlic in a saucepan with 1 cup of olive oil.
- Heat the mixture on low heat for about 20 minutes, until the garlic is golden brown.
- Let the oil cool, then strain it into a clean jar. Discard the garlic.
- Your garlic infused olive oil is ready to use! Store it in a cool, dark place.
Remember, garlic infused olive oil adds a rich, savory flavor to pasta, bread, and salads. It’s also great for sautéing vegetables.
- Chili Infused Coconut Oil
If you like a bit of heat in your food, chili infused coconut oil is for you. Here’s how to make it:
- Take 2-3 dried chilies and crush them into small pieces.
- Place the crushed chilies in a saucepan with 1 cup of coconut oil.
- Heat the mixture on low heat for about 15 minutes, until the chilies darken in color.
- Let the oil cool, then strain it into a clean jar. Discard the chilies.
- Your chili infused coconut oil is ready to use! Store it in a cool, dark place.
Chili infused coconut oil can add a spicy kick to your dishes. It’s perfect for stir-fries, curries, and even popcorn!
Remember, infusing oil at home is a fun and easy way to add flavor to your meals. So, why not give these recipes a try? Happy cooking!
Guide to Making Homemade Infused Vinegars
Creating your own homemade infused vinegars can be a fun and rewarding experience. Not only do they add a unique flavor to your dishes, but they also make great gifts. The key to a successful infusion lies in choosing the right vinegar. Let’s explore this in more detail.
Choosing the Right Vinegar for Infusion
When it comes to infusing vinegars, not all types are created equal. The type of vinegar you choose can greatly affect the flavor of your infusion. Here are some things to consider:
- Types of vinegars suitable for infusion: The most commonly used vinegars for infusions are white wine vinegar, red wine vinegar, and apple cider vinegar. These vinegars have a mild flavor that allows the infused ingredients to shine. Balsamic vinegar can also be used, but its strong flavor might overpower the other ingredients.
- Factors to consider when choosing vinegar: When choosing a vinegar for your infusion, consider the flavor profile you’re aiming for. If you want a sweet infusion, apple cider vinegar might be your best bet. For a more savory infusion, consider using red wine vinegar. The acidity of the vinegar is also important. A vinegar with high acidity can preserve the infused ingredients better, but it might also overpower their flavors. Lastly, consider the color of the vinegar. Light-colored vinegars might not change much in color after the infusion, while dark-colored vinegars might become even darker.
Remember, the key to a successful vinegar infusion is experimentation. Don’t be afraid to try different types of vinegars and see which one you like best. Happy infusing!
Vinegar Infusion Techniques
There are two primary techniques for infusing vinegar: the hot infusion method and the cold infusion method. Both methods are effective, but each has its unique advantages and characteristics. Let’s explore each one in detail.
-
Hot Infusion Method
The hot infusion method is a quick and efficient way to infuse vinegar. It involves heating the vinegar and adding your chosen ingredients, such as herbs, fruits, or spices. Here’s a step-by-step guide:
- Choose your vinegar and ingredients. The vinegar should be of high quality, and the ingredients should be fresh and clean.
- Heat the vinegar in a saucepan until it’s hot but not boiling.
- Add your ingredients to the hot vinegar and let them steep for about 10-15 minutes.
- Allow the mixture to cool, then strain it into a clean jar or bottle.
- Seal the jar or bottle and store it in a cool, dark place.
The hot infusion method is great for quick results, but it might slightly alter the flavor of the vinegar due to the heat.
-
Cold Infusion Method
The cold infusion method takes longer than the hot infusion method, but it preserves the original flavor of the vinegar and the ingredients more effectively. Here’s how to do it:
- Select your vinegar and ingredients. As with the hot infusion method, the vinegar should be of high quality, and the ingredients should be fresh and clean.
- Place your ingredients in a clean jar or bottle.
- Pour the vinegar over the ingredients, making sure they are completely submerged.
- Seal the jar or bottle and store it in a cool, dark place for 1-4 weeks. The longer you let it infuse, the stronger the flavor will be.
- After the infusion period, strain the mixture into a clean jar or bottle.
The cold infusion method requires patience, but the resulting infused vinegar will have a more complex and nuanced flavor.
Whether you choose the hot or cold infusion method, making homemade infused vinegars is a fun and creative way to add unique flavors to your cooking. Experiment with different vinegars and ingredients to find your favorite combinations!
Vinegar Infusion Recipes
Infusing vinegar with different flavors not only enhances its taste but also adds a unique twist to your dishes. Here are two simple yet delicious vinegar infusion recipes that you can try at home:
- Raspberry Infused Balsamic Vinegar
This recipe is a perfect blend of the tartness of raspberries and the sweet, rich flavor of balsamic vinegar. It’s an excellent addition to salads, grilled vegetables, and even desserts.
Ingredients:
- 1 cup of fresh raspberries
- 2 cups of balsamic vinegar
Instructions:
- Place the raspberries in a jar and crush them lightly to release their juice.
- Pour the balsamic vinegar over the raspberries.
- Seal the jar and let it sit in a cool, dark place for at least a week.
- After a week, strain the mixture and store the infused vinegar in a clean bottle.
- Herb Infused Apple Cider Vinegar
This infusion combines the health benefits of apple cider vinegar with the aromatic flavors of your favorite herbs. It’s a great way to add a burst of flavor to marinades, dressings, and sauces.
Ingredients:
- 2 cups of apple cider vinegar
- A handful of your favorite herbs (such as rosemary, thyme, or basil)
Instructions:
- Place the herbs in a jar.
- Pour the apple cider vinegar over the herbs.
- Seal the jar and let it sit in a cool, dark place for at least two weeks.
- After two weeks, strain the mixture and store the infused vinegar in a clean bottle.
Remember, the key to a successful vinegar infusion is patience. The longer you let the vinegar infuse, the stronger the flavor will be. So, start experimenting with these recipes and discover the endless possibilities of homemade infused vinegars!
DIY Flavored Oils and Vinegars: Safety and Storage
Creating your own flavored oils and vinegars at home can be a fun and rewarding experience. However, it’s important to understand the proper safety and storage techniques to ensure the quality and longevity of your homemade products. Let’s delve into these aspects.
- Proper storage techniques for infused oils and vinegars
Storing your homemade infused oils and vinegars correctly is crucial to maintain their flavor and prevent spoilage. Here are some key tips:
- Always store your infused oils and vinegars in a cool, dark place. Exposure to heat and light can degrade the quality of the oil or vinegar and cause it to spoil faster.
- Use clean, airtight containers for storage. Glass bottles or jars are ideal as they don’t react with the oil or vinegar.
- Label your containers with the date of preparation. Infused oils are best used within a month, while vinegars can last up to three months.
- Safety considerations when infusing oils and vinegars at home
While infusing oils and vinegars at home, it’s important to follow certain safety guidelines to prevent foodborne illnesses:
- Always use fresh, high-quality ingredients. Avoid using any produce that is bruised, damaged, or overly ripe.
- Ensure all your equipment is clean and sterilized. This includes the containers you’ll be using for storage.
- When infusing oils, avoid using fresh garlic as it can lead to botulism, a serious foodborne illness. Instead, opt for dried or dehydrated garlic.
- Always refrigerate infused oils to slow down the growth of bacteria.
By following these safety and storage guidelines, you can enjoy your homemade infused oils and vinegars safely and to their fullest potential. Remember, the key to a successful DIY project is patience, cleanliness, and attention to detail.
Conclusion: Enjoying Your Homemade Flavored Oils and Vinegars
Now that you’ve learned how to create your own infused oils and vinegars, it’s time to enjoy them. These homemade infusions are not only a healthier alternative to store-bought products, but they also add a unique flavor to your meals. They can be used in a variety of ways, from cooking to gifting. Let’s explore some of the ways you can enjoy your DIY infusions.
- Using your DIY infused oils and vinegars in recipes
- Gift ideas for your homemade infusions
Your homemade infused oils and vinegars can be used in a multitude of recipes. They can be used as a marinade for meat, a dressing for salads, or a dip for bread. For instance, a garlic-infused olive oil can be used to sauté vegetables, while a raspberry-infused vinegar can add a tangy twist to your salad. The possibilities are endless and limited only by your creativity. Experiment with different recipes and discover new flavors.
Homemade infused oils and vinegars also make thoughtful and unique gifts. You can package them in beautiful glass bottles and add a personalized label. They are perfect for housewarming gifts, holiday presents, or as a special treat for foodie friends. Remember, the best gifts are those that are handmade with love and care.
In conclusion, making your own flavored oils and vinegars is not only a fun and rewarding process, but it also allows you to add a personal touch to your cooking and gifting. So, start infusing your oils and vinegars today and enjoy the wonderful flavors they bring to your meals.