
Introduction to DIY Plant-Based Milk
Plant-based milk has become a popular choice for many people, whether for health reasons, dietary restrictions, or simply a desire for a more sustainable lifestyle. Making your own plant-based milk at home is not only easy but also offers numerous benefits. In this article, we will explore the advantages of homemade vegan milk and the cost-effectiveness of this DIY approach.
- Benefits of Homemade Vegan Milk
- Cost-Effectiveness of Making Plant-Based Milk at Home
Creating your own vegan milk at home has several advantages. First, you have complete control over the ingredients, ensuring there are no hidden additives or preservatives often found in store-bought versions. This can lead to a healthier, more nutritious beverage. Second, homemade vegan milk often tastes fresher and richer than its commercial counterparts. Lastly, making your own milk allows you to experiment with different types of plant-based sources like nuts, oats, and soy, tailoring the flavor to your personal preference.
While the initial investment in a blender or nut milk bag may seem high, the long-term savings can be significant. Store-bought plant-based milk can be expensive, especially if you prefer organic or specialty brands. On the other hand, basic ingredients for homemade milk like oats or soybeans are relatively cheap and widely available. Moreover, you can make as much or as little as you need, reducing waste and saving money in the long run. According to a Wikipedia study, making your own oat milk, for example, can be up to 80% cheaper than buying it from a store.
In the following sections, we will guide you through the process of making your own soy, oat, and nut milk at home, providing step-by-step instructions and tips for the best results. Join us in embracing the homemade plant-based milk lifestyle!
Getting Started with Homemade Vegan Milk
Embarking on the journey of making your own vegan milk at home can be exciting and rewarding. With just a few simple tools and ingredients, you can create a variety of delicious and nutritious plant-based milks. Let’s start by exploring the essential equipment you’ll need for making almond milk at home.
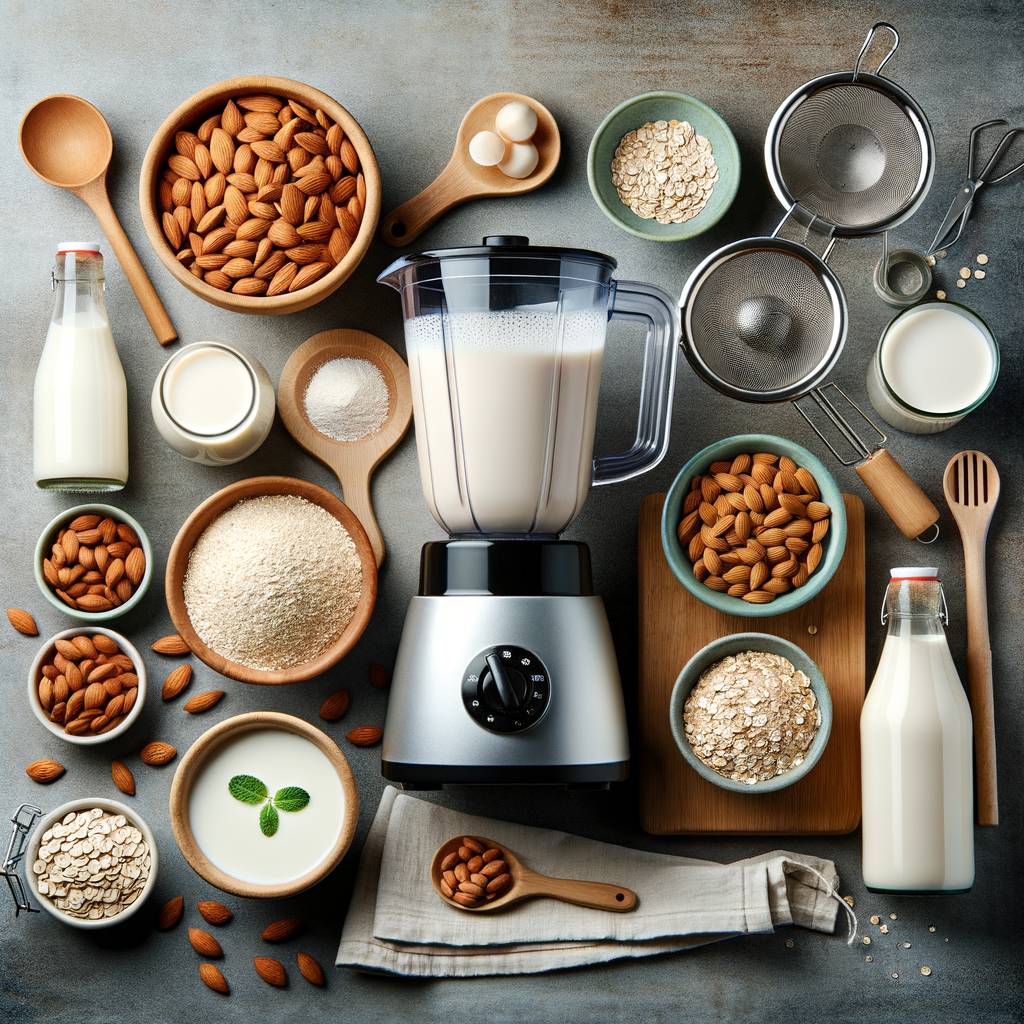
Essential Equipment for Making Almond Milk at Home
Creating your own almond milk at home is a straightforward process, but having the right equipment can make all the difference. Here are the key pieces of equipment you’ll need:
- Blender: A high-powered blender is crucial for breaking down the almonds into a smooth, creamy consistency. It’s worth investing in a good quality blender to ensure the best results.
- Nut milk bag or cheesecloth: After blending, you’ll need to strain the mixture to separate the milk from the almond pulp. A nut milk bag or cheesecloth is perfect for this job. They’re reusable, easy to clean, and ensure a smooth, pulp-free milk.
- Storage containers: Once your almond milk is ready, you’ll need somewhere to store it. Glass jars or bottles with airtight lids are ideal. They’re easy to clean, don’t absorb flavors, and allow you to see how much milk you have left at a glance.
With these tools in hand, you’re ready to start making your own delicious, homemade almond milk. Stay tuned for our step-by-step guide on how to choose the right ingredients for your plant milk recipes.
Choosing the Right Ingredients for Your Plant Milk Recipes
When it comes to making your own plant milk, the quality of the ingredients you use can greatly impact the taste and nutritional value of your final product. Here are some key factors to consider when choosing your ingredients:
- Selecting high-quality nuts and grains
- Choosing natural sweeteners
- Importance of using filtered water
High-quality nuts and grains are the foundation of any good plant milk recipe. Opt for organic, non-GMO options whenever possible. These tend to have a fresher, more robust flavor and are free from harmful pesticides and genetically modified organisms. For example, almonds, cashews, and oats are popular choices for homemade plant milk due to their rich flavor and nutritional content. Almond milk, for instance, is a good source of vitamin E and is naturally low in calories.
Sweeteners can add a touch of sweetness to your plant milk, making it more palatable, especially if you’re new to plant-based milks. However, it’s important to choose natural sweeteners over refined sugars. Options like raw honey, maple syrup, or dates not only sweeten your milk but also provide additional nutrients. For example, maple syrup contains antioxidants and minerals like zinc and manganese.
Water is a key ingredient in plant milk recipes, and the quality of water you use can affect the taste of your milk. Filtered water is free from impurities and chlorine, which can alter the taste and quality of your homemade plant milk. It’s a small detail, but one that can make a big difference in your final product.
In conclusion, selecting high-quality ingredients is crucial for making delicious and nutritious homemade plant milk. By choosing organic nuts and grains, natural sweeteners, and filtered water, you can ensure that your plant milk is as healthy and tasty as possible.
Step-by-Step Guide to DIY Soy Milk
Homemade soy milk is a healthy and tasty alternative to dairy milk. It’s simple to make, and you can customize it to your taste. Here’s a step-by-step guide to making your own soy milk at home.
- Soaking the Soybeans
- Blending and Straining the Mixture
- Cooking the Soy Milk
- Storing Your Homemade Soy Milk
Start by soaking 1 cup of soybeans in 3 cups of water. Leave them to soak for at least 8 to 12 hours. This process softens the beans and makes them easier to blend. Remember to rinse the beans thoroughly before moving to the next step. For more information on soaking soybeans, you can visit Wikipedia’s page on soybeans.
Next, blend the soaked soybeans with 4 cups of water until smooth. Then, strain the mixture using a cheesecloth or a fine-mesh strainer to separate the soy milk from the pulp. The pulp, known as okara, can be used in other recipes or composted.
Now, it’s time to cook the soy milk. Pour it into a pot and bring it to a boil over medium heat. Be sure to stir frequently to prevent the milk from burning. Once it starts to boil, reduce the heat and let it simmer for about 20 minutes. This cooking process not only improves the taste but also makes the soy milk safer to drink by killing any potential bacteria.
After cooking, let your soy milk cool down before storing it. Pour it into a clean glass jar or bottle and store it in the refrigerator. Homemade soy milk can last for up to 5 days in the fridge. Always shake well before use as natural soy milk tends to separate.
And there you have it! Your very own homemade soy milk. Not only is it a fun and easy process, but it also allows you to control the ingredients and customize the flavor to your liking. Enjoy your delicious and nutritious DIY soy milk!
How to Make Oat Milk
Creating your own oat milk at home is a simple, cost-effective, and environmentally friendly alternative to store-bought milk. Here’s a step-by-step guide on how to make oat milk.
- Choosing the Right Oats
- Blending and Straining Process
- Storing Your Homemade Oat Milk
Choosing the right oats is the first step in making your own oat milk. Opt for whole grain oats, also known as groats, for the best results. They are minimally processed and retain all the fiber and nutrients. Avoid instant oats as they can make your milk slimy. If you’re gluten intolerant, make sure to choose gluten-free oats. Here is more information about oats.
Once you’ve chosen your oats, the next step is the blending and straining process. Soak 1 cup of oats in water for about 15 minutes. Drain the oats and blend them with 4 cups of fresh water for about 30 seconds. Don’t over blend as it can make the milk slimy. After blending, strain the mixture using a fine mesh strainer or a nut milk bag. Repeat the straining process a couple of times to ensure a smooth consistency.
Storing your homemade oat milk properly is crucial to maintain its freshness. Pour the milk into a clean glass jar or bottle and store it in the refrigerator. Homemade oat milk can last up to 5 days in the fridge. Shake well before each use as the mixture can separate over time.
And there you have it – your own homemade oat milk! Not only is it a healthier alternative, but it’s also a great way to reduce your carbon footprint. Enjoy it in your morning coffee, with your cereal, or simply on its own. Happy milking!
Creating Delicious Homemade Nut Milk
One of the most popular nut milks is almond milk. It’s creamy, delicious, and surprisingly easy to make at home. Here’s a simple recipe to get you started.
Almond Milk Recipe
Homemade almond milk is a fantastic alternative to dairy milk, and it’s incredibly easy to make. Here’s a step-by-step guide to creating your own.
- Soaking the almonds: Start by soaking one cup of almonds in water overnight. This softens the almonds and makes them easier to blend. Ensure the almonds are completely submerged in water. According to Wikipedia, soaking also helps to reduce the levels of phytic acid in the almonds, which can interfere with the absorption of certain nutrients in the body.
- Blending and straining the almonds: After soaking, drain and rinse the almonds. Then, blend them with four cups of water until the mixture is smooth. This should take about one to two minutes. Next, strain the mixture using a nut milk bag or a fine-mesh sieve lined with cheesecloth. This will separate the almond pulp from the milk.
- Flavoring and storing your almond milk: You can flavor your almond milk with a bit of vanilla extract, a pinch of salt, or a sweetener like honey or agave syrup. Once flavored to your liking, store your homemade almond milk in the refrigerator. It should stay fresh for up to five days.
And there you have it – delicious, homemade almond milk. Not only is it a healthier alternative to store-bought versions, but it also allows you to control the ingredients and flavors. Happy milking!
Cashew Milk Recipe
Creating your own homemade cashew milk is a simple and rewarding process. This plant-based milk alternative is not only delicious, but also packed with nutrients. Let’s walk through the steps together.
- Preparation of Cashews
- Blending Process
- Storing Your Homemade Cashew Milk
Start by soaking 1 cup of raw cashews in water. This process softens the nuts, making them easier to blend. Leave them to soak for at least 4 hours, or overnight for the best results. Once they’re soft, drain and rinse them thoroughly. Cashews are a great source of vitamins and minerals, and soaking helps to activate these nutrients.
Next, place the soaked cashews in a blender. Add 4 cups of fresh water. Blend on high speed for about 2 minutes, or until the mixture is smooth and creamy. If you prefer a thinner consistency, you can add more water. Remember, the blending process is crucial to achieving the perfect texture for your cashew milk.
Once your cashew milk is blended, it’s time to store it. Pour the milk into a glass jar or bottle and seal it tightly. Homemade cashew milk can be stored in the refrigerator for up to 5 days. Shake well before each use, as natural separation may occur. Enjoy your homemade cashew milk in cereals, smoothies, or just on its own!
Creating homemade cashew milk is a fun and healthy way to enjoy a dairy-free alternative. Not only is it simple to make, but it also allows you to control the ingredients, ensuring a natural and nutritious option for your family.
Benefits of a Plant-Based Diet
Adopting a plant-based diet can have numerous benefits, not just for your health, but also for the environment and the economy. Let’s delve into these advantages.
- Health benefits
- Environmental impact
- Economic advantages
A plant-based diet is rich in fiber, vitamins, and minerals, which can help lower the risk of heart disease, high blood pressure, and type 2 diabetes. According to Wikipedia, a study found that people who follow a plant-based diet have a 20% lower risk of dying from a cardiovascular disease compared to those who consume meat.
Switching to a plant-based diet can significantly reduce your carbon footprint. The production of plant-based foods requires less water, land, and energy compared to meat production. As per Wikipedia, livestock farming contributes to 14.5% of all human-induced greenhouse gas emissions.
Plant-based diets can be more economical than meat-based diets. Fruits, vegetables, grains, and legumes are generally less expensive than meat and dairy products. Moreover, the cost of healthcare can be reduced in the long run as plant-based diets are associated with lower risks of chronic diseases.
In conclusion, a plant-based diet can be a beneficial choice for your health, the environment, and your wallet. Whether you’re considering making your own plant-based milk or simply incorporating more plant-based foods into your diet, the benefits are clear and compelling.
Vegan Milk Alternatives
While many people are familiar with the traditional cow’s milk, there are a variety of vegan alternatives that offer unique flavors and health benefits. These plant-based milks are a great choice for those following a vegan lifestyle, or for anyone who is lactose intolerant or simply looking for a change. Let’s explore some of these alternatives.
- Rice Milk
- Coconut Milk
- Hemp Milk
Rice milk is a popular vegan milk alternative made from milled rice and water. It is naturally sweet and is often fortified with vitamins and minerals, making it a nutritious choice. It’s also the least allergenic of all milk alternatives, making it a safe option for those with allergies or sensitivities. However, it’s important to note that rice milk is relatively low in protein compared to other vegan milks. Learn more about rice milk here.
Coconut milk is a creamy, rich milk alternative made from the flesh of mature coconuts. It’s a great source of healthy fats and has a unique flavor that works well in a variety of dishes. Coconut milk is also high in calories and saturated fats, so it’s best to consume it in moderation. Learn more about coconut milk here.
Hemp milk is made from the seeds of the hemp plant. It’s a good source of plant-based protein and contains omega-3 and omega-6 fatty acids, which are essential for heart health. Hemp milk has a slightly nutty flavor and a thin, watery texture. It’s a great option for those looking for a nutritious, plant-based milk alternative. Learn more about hemp milk here.
These are just a few examples of the many vegan milk alternatives available. Each one offers its own unique flavor and nutritional profile, so you can choose the one that best fits your dietary needs and taste preferences. Remember, variety is the spice of life, so don’t be afraid to try something new!
Conclusion: Embracing the Homemade Plant-Based Milk Lifestyle
As we conclude, it’s clear that making your own plant-based milk at home is not only a fun and rewarding process, but it also comes with a host of benefits. Let’s take a moment to recap these advantages and encourage you to continue experimenting with different plant milk recipes.
- Recap of the benefits of DIY plant-based milk: Homemade plant-based milk is a healthier alternative to store-bought versions. It’s free from preservatives, artificial sweeteners, and unnecessary additives. Moreover, it’s cost-effective and environmentally friendly. By making your own vegan milk, you can control the ingredients and customize the taste to your liking. Plus, it’s a great way to incorporate more plant-based foods into your diet, which has been linked to a lower risk of heart disease, diabetes, and certain types of cancer. Wikipedia provides more information on the benefits of a plant-based diet.
- Encouragement to experiment with different plant milk recipes: Don’t be afraid to get creative in the kitchen! Try making milk from different types of nuts, grains, and seeds. Each type of plant milk has its own unique flavor and nutritional profile, so you can choose the one that best suits your dietary needs and taste preferences. You can also experiment with adding different flavors, such as vanilla, cinnamon, or cocoa. The possibilities are endless, and the process of discovering your favorite plant milk recipe can be a fun and rewarding journey.
In conclusion, embracing the homemade plant-based milk lifestyle is a step towards a healthier, more sustainable, and more flavorful life. So, why not give it a try? You might be surprised by how easy and enjoyable it is to make your own plant-based milk at home. Happy milking!